Categories
Groups
Think of groups like folders—they allow you to put data or locations together for easy access or comparison. For example, you can break emissions down based on business units or regions.
Updated: February 2023
Table of Contents
Groups overviews
Groups enable you to add hierarchy to emissions data—you can define segments like sales regions, teams, product lines, etc. In addition to creating hierarchy, groups are commonly used to bundle together similar sets of data (e.g., entries related to a company-wide green initiative). This makes it easier to identify and segment your emissions data.
How-to guide
Create groups
To create groups, go to your house company profile and select groups in the menu.
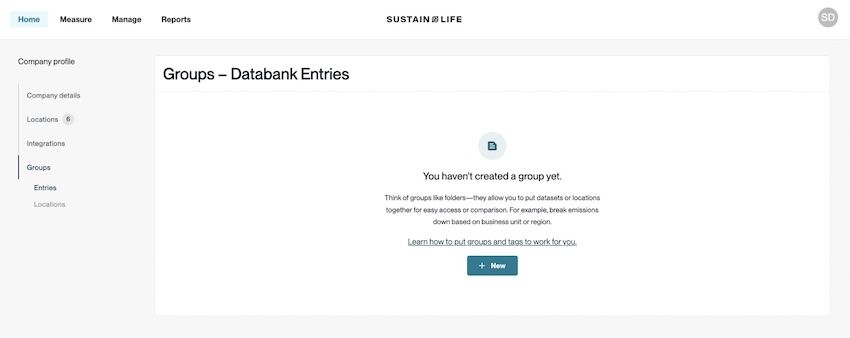
Before you create a group, decide if it should apply to locations or entries. An easy way to make this decision is to consider how you would like the data to end up in a group. If you add locations to a group, that means any time you enter emissions data for that location, it will end up in that group automatically. This might make sense, for example, if you create a group for your North American locations. If you add entries to a group, you’ll need to add the data to the group entry-by-entry, either when you enter the data manually or in bulk (more on that below).
This option is best if you track data for various business units that work in the same office, for example data related to business travel. A group can only be applied to locations OR to individual entries. Once you’ve created a location group, you will not be able to apply it to individual entries, only to all entries associated with that location. Once you decide which type of group to create, you can start building your hierarchy. Groups can have as many as 10 levels of nesting. For reference, the example below contains three: Business Unit > Operations > Sustainability.
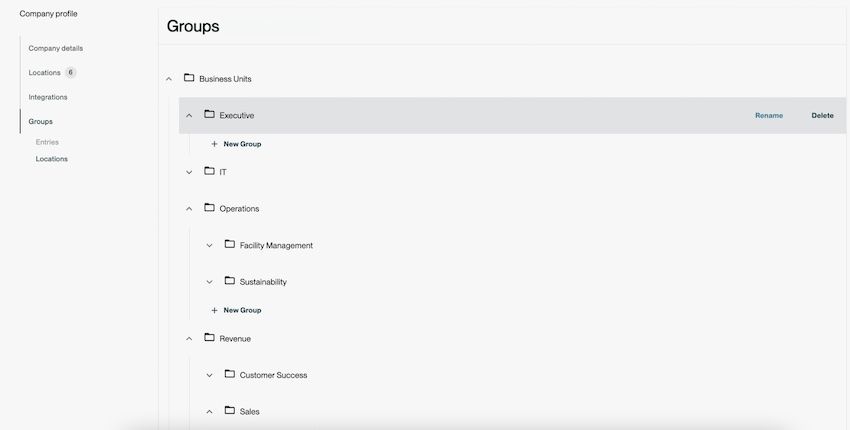
You can edit and delete names while you build, but it’s recommended that you map out your structure before starting to create the group. Your company’s reporting structure is a good thing to reference or just use directly, since these groups will largely inform how you can report your data.
Apply groups to locations
You can apply groups to entire locations, meaning all data recorded against that location is assigned to a group, or you can do this entry-by-entry. While there is no limit to how many groups you can create, carefully consider which approach you’d like to take (locations or entries) before creating your group, as you cannot combine these approaches.
Location groups should be used when you segment data at the location level. For example, you want all data associated with a location automatically added to that group.
For entry groups, no data is ever added to that group automatically—you, as the user, must add the data entry-by-entry. In short, if you want data for any location to automatically be added to a group, you should use location groups. If you want to be able to decide which data entries belong to which groups, use entry groups. Navigate to your company profile and select locations from the menu.
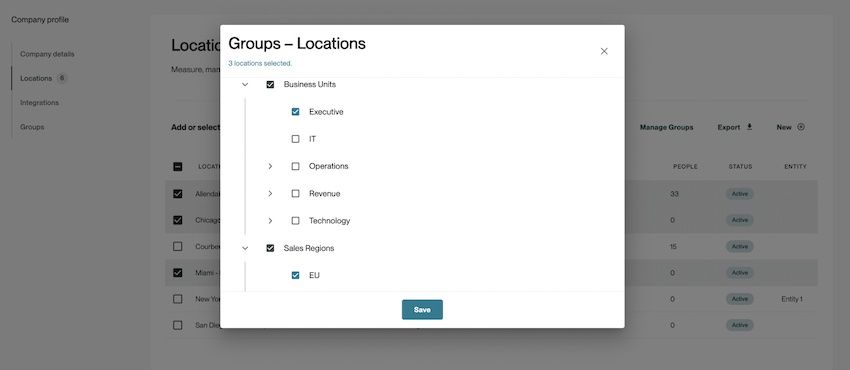
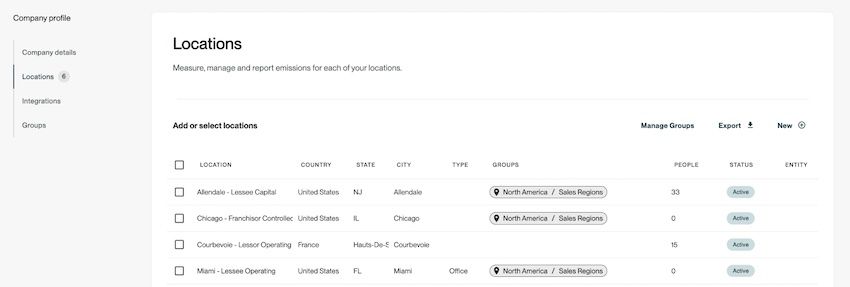
To add locations to your groups (or sub-groups), select the relevant locations from the table, then select manage groups.

Now, you can add these locations to multiple groups at once.
However, you cannot add locations to two sub-groups (child groups) that sit under the same top-level (parent) group.
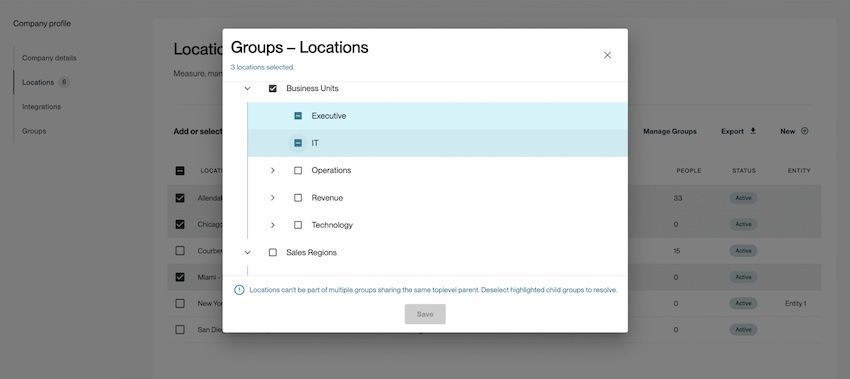
Once you create or select your groups, save. You’ll now see those groups listed in the locations table.
Apply groups to entries
You can add groups to data entries either one-by-one or in bulk. Location groups should be used when you segment data at the location level. For example, you want all data associated with a location automatically added to that group.
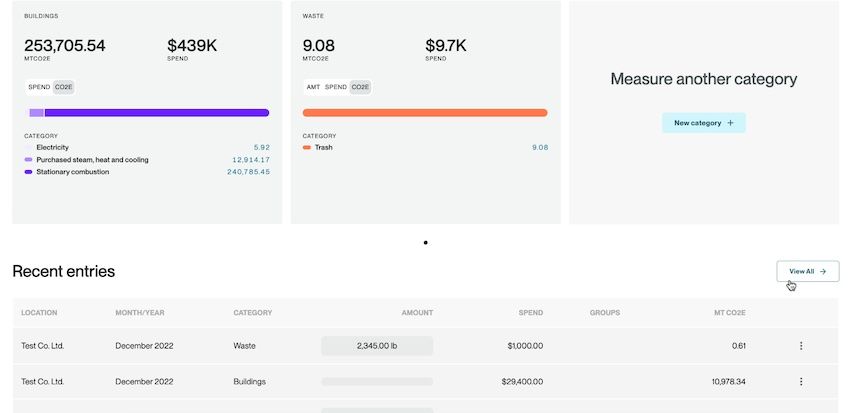
For entry groups, no data is ever added to that group automatically—you, as the user, must add the data entry-by-entry. In short, if you want data for any location to automatically be added to a group, you should use location groups. If you want to be able to decide which data entries belong to which groups, use entry groups. To add groups to data entries in bulk, navigate to the home page, and select view all next to the recent entries table.
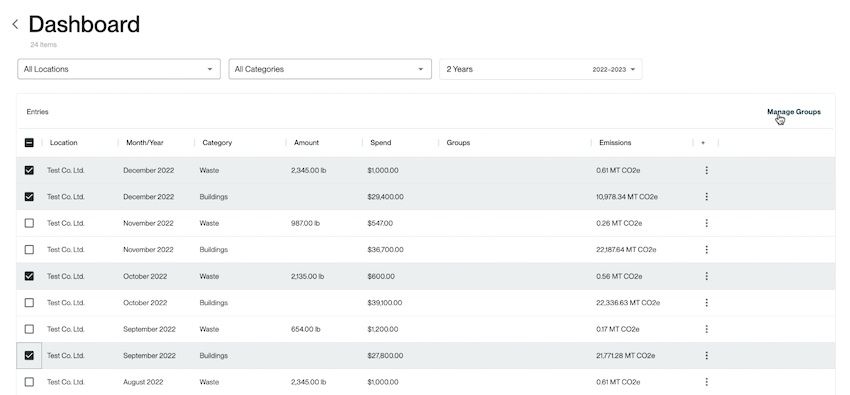
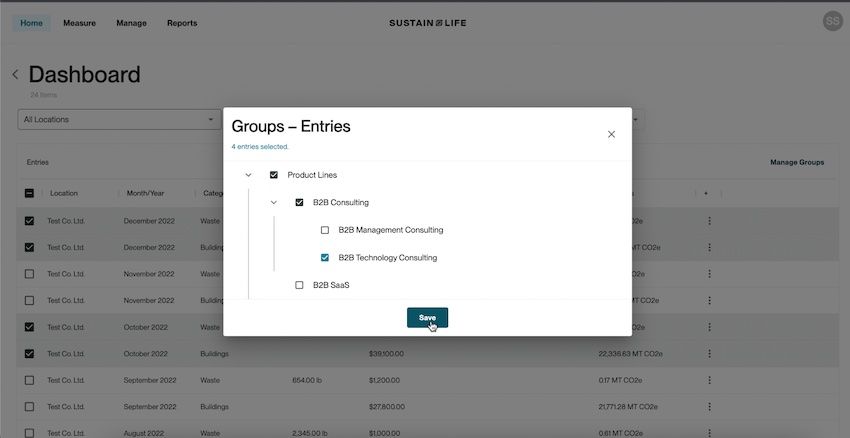
Select the entries you want to add, and then select manage groups. The groups that appear here are the entry groups that were added to your company profile.
To add groups to entries one-by-one, select add groups for any category you track data for.
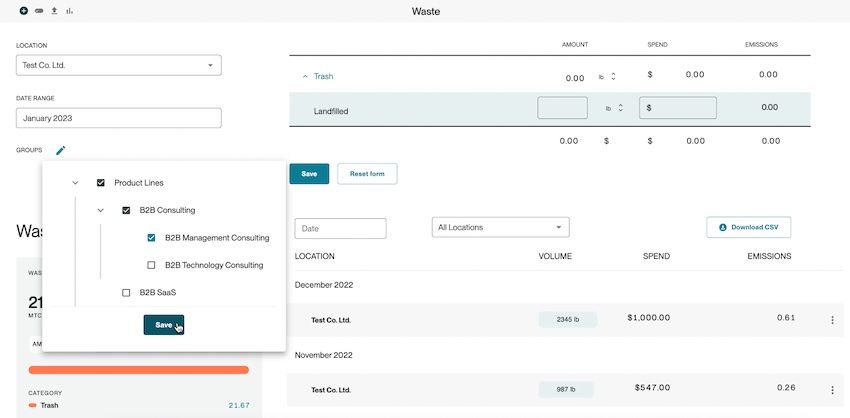
Like location groups, you can add entries to multiple groups but cannot add them to two sub-groups (child groups) that share the same top-level (parent) group.
Filtering reports by groups
For a quick view into the data associated with any top-level (parent) group, you can apply a filter to the Home screen by selecting the filter icon located next to the timeframe filters.
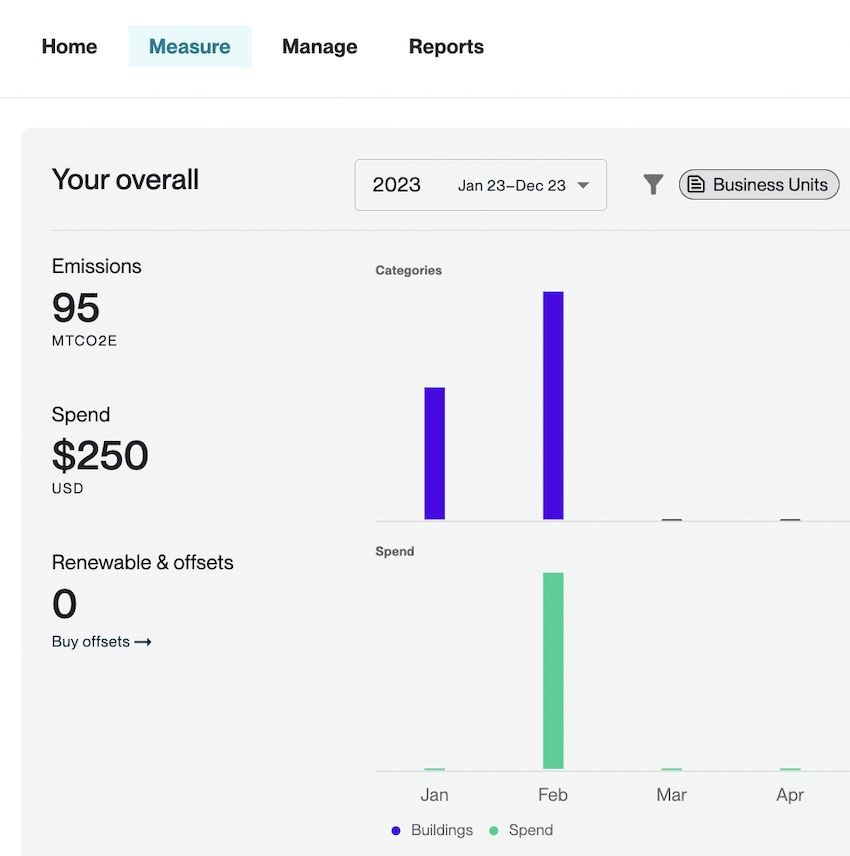
This only allows you to look at all data that ladders up to the top level. The ability to filter more granularly in the Analytics Reports will be available soon.
FAQs
What are common location hierarchies you’ve seen this feature used for?
Businesses, particularly large ones, often group their locations based on region (e.g., North America vs. Europe) or different functions (e.g., warehouse vs. call center). If your company is currently distributing company-wide reports by business segment, it could be valuable to create these segments by grouping common data.
What are common data groups you’ve seen this feature used for?
If your business has an important emissions reduction initiative (e.g., switching fleet vehicles from gas to electric), grouping the individual entries tied to that initiative could be a good path. This way, you can more effectively track the results of these changes and understand the impact of this decision.
Does one group of locations always need to be compared to another group?
No, many users will use groups to essentially “tag” a location or an entry. For instance, if you have a regional headquarters or a particular location that you enter all of your business travel into, you can use groups for these use cases. Other members of your organization can then reference these groups when they’re trying to understand what data was entered into the application.
Copyright 2025 Sustain.Life All rights reserved